|
Instructions:
press "press" in the following instructions to press the button and then
loosen. "Long press" means press the button to hold for more than 1
seconds.
Switch on the power switch and enter the standby mode.
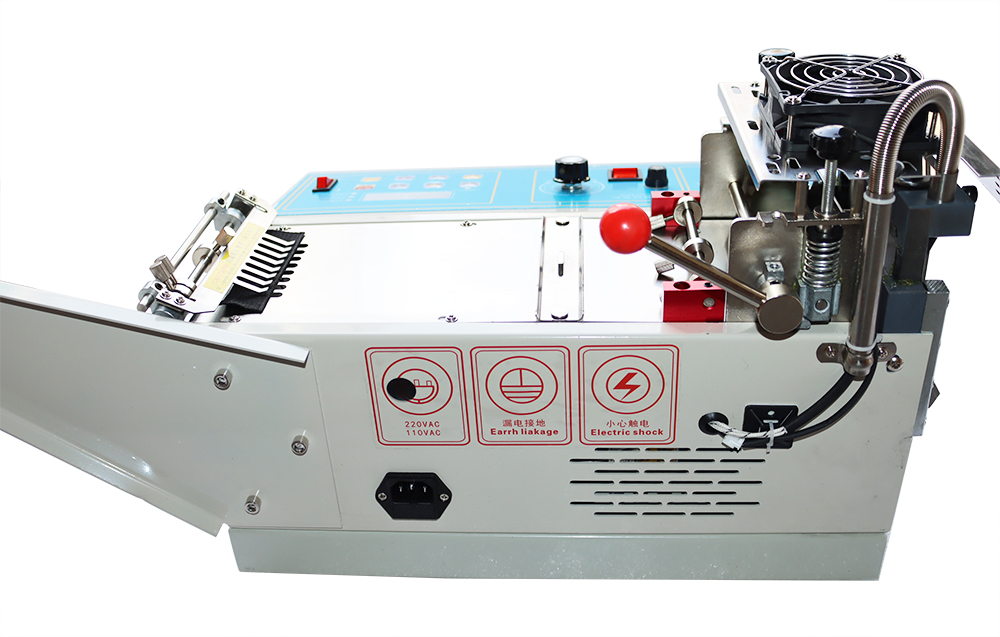
1.
Welding
energy adjustment
In
the standby mode, press the function key of the control panel to enter the
setting state, and the POWER status light starts flashing. Press one "+ key"
welding energy, plus one, press long "+ key" welding energy increase rapidly;
press one "key" welding energy to reduce one, long press "key" welding energy to
reduce rapidly. Press the four function key to save the setup parameters and
exit the set state to enter the standby mode.
The welding energy value is related to the output current: the greater the
welding energy, the greater the output current, and vice versa. The welding
energy adjusted to the appropriate value, in order to ensure the welding work of
solid and not "breakdown" or "false" phenomenon.
2.
Welding
pulse adjustment
In
the standby mode, press the "function key" of the two control panel to enter the
setting state, and the CYCLE status light starts flashing.
Press one "+ key" welding pulse number plus one, press one "key" welding pulse
number minus one. Press the three function key to save the setup parameters and
exit the set state to enter the standby mode.
The number of welding pulses is the number of pulses to be welded. Less welding
pulse number should be used for workpieces with lower melting point or thinner,
and more welding pulse should be used for workpieces with higher melting point
or thickness. Generally, the number of welding pulses is recommended to be 2.
3.
Preload
time adjustment
In
the standby mode, press the "function key" of the three control panel to enter
the setting state, and the DELAY status light starts flashing. Press a "+ key"
welding preload time, plus one, long press "+ key" welding preload time
increased rapidly; press a "key" welding preload time minus one, long press
"key" welding, pre pressing time is reduced rapidly. Press the two function key
to save the setup parameters and exit the set state to enter the standby mode.
Preloading time value and the head start this period of time to discharge
welding related action: preloading time the greater the value from head start
action to discharge welding time is longer, and the shorter period. Adjust the
preload time to the appropriate value to ensure that no "fire" or "slow welding"
phenomenon occurs during the welding process.
4.
Welding
mode adjustment
In
the standby mode, press the "function key" of the four control panel to enter
the setting state, and the MODE status light starts flashing. Press one "+ key"
welding mode plus one, press one "key" welding mode to reduce one. Press the
"function key" to save the setup parameters and exit the set state to enter the
standby mode.
Welding mode 1: standby mode, closed pedal switch, horn down and put pressure on
the workpiece discharge welding, welding head reduction, complete a welding,
enter the standby state. This mode applies to normal welding.
Welding mode 2: standby mode, closed pedal switch, welding head down and put
pressure on the workpiece, press the "+" button for discharge welding or release
the foot switch reset head. This mode is suitable for debugging welding.
Welding mode 3: standby mode, closed pedal switch, welding head without action
and immediately discharge. This mode is suitable for hand welding of welding arm
and extension line.
5.
Electrode
height adjustment
Loosen the electrode locking screw, adjust the electrode to the proper height,
and then lock the electrode to lock the screw.
6.
Worktable
height adjustment
Unscrew work table adjusting screw, adjust worktable to proper height and lock
screws.
7.
Electrode
pressure adjustment
Pull up the pressure regulating valve knob, rotate clockwise, increase the
electrode pressure, turn counterclockwise, reduce the electrode pressure, adjust
to the proper pressure, then push the pressure valve knob to the inside.
8.
Welding
arm rising speed adjustment
Loosen the locking nut of the rising speed control valve, rotate the speed
regulating valve clockwise, slow down the rising speed of the welding arm, speed
up the speed of the welding arm counterclockwise, adjust to the proper speed,
then screw the nut tightly.
9.
Welding
arm falling speed adjustment,
Loosen the locking nut of the descending speed control valve, rotate the speed
reducing valve clockwise, slow down the speed of the welding arm, rotate the
speed valve counterclockwise, speed up the welding arm, adjust to the proper
speed, then screw the nut tightly.
|